As I described in my article about speeding up vMotion, Multi-NIC vMotion provides load balancing the vMotion network traffic over multiple network adapters. It means that one vMotion session is balanced between all available vmknic. In this post I will show how to configure this feature with vSphere Standard Switch (vSS) or vSphere Distributed Switch (vDS).
Requirements and prerequisites are as follows:
- at least two dedicated network adapters for vMotion per host (If you do not have dedicated links for vMotion, consider using Network I/O Control. vMotion can saturate a link)
- prepared IP and mask settings for each VMkernel
- ensure that all VMkernel ports configured are in the same IP subnet/VLAN on all hosts
To configure Multi-NIC vMotion in vSphere 5.x on a Standard vSwitch please follow steps:
- Log into the vSphere Client and select the host from the inventory panel.
- Click the Configuration tab and select Networking.
- Click Add Networking and choose VMkernel as the Connection Type.
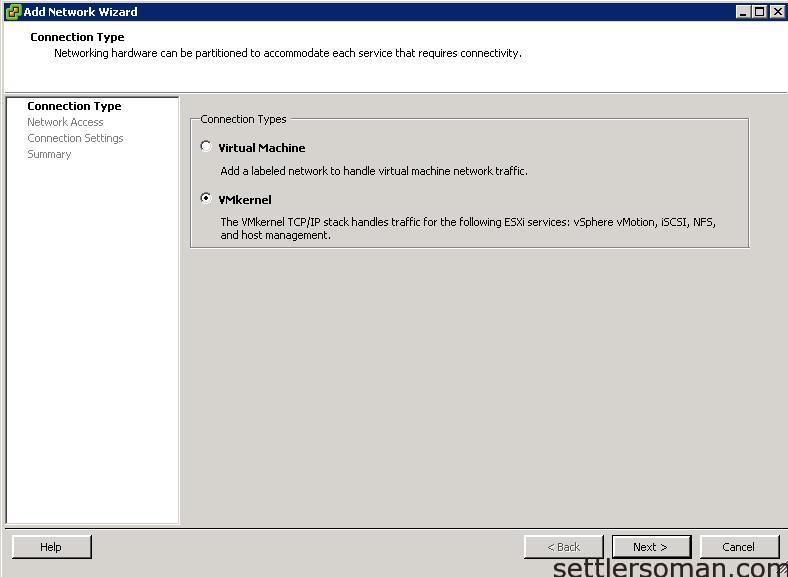
- Click Next.
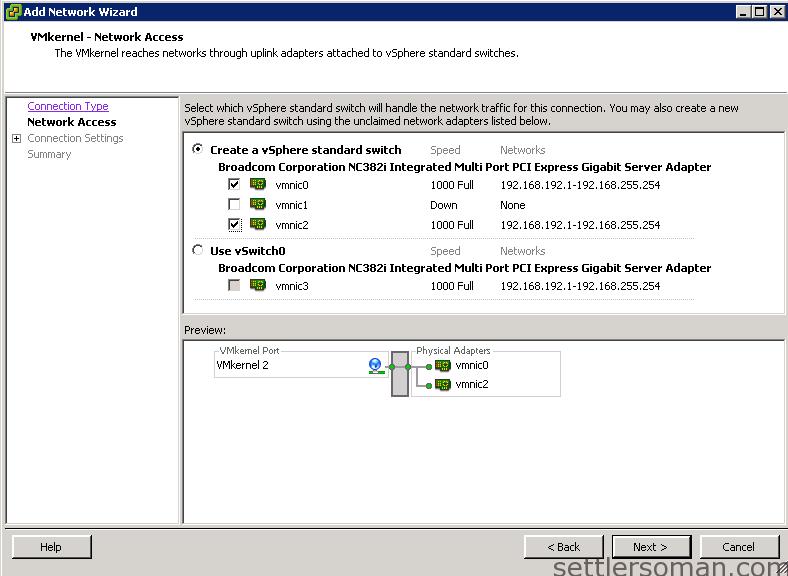
- Add two or more NICs to a new standard switch.
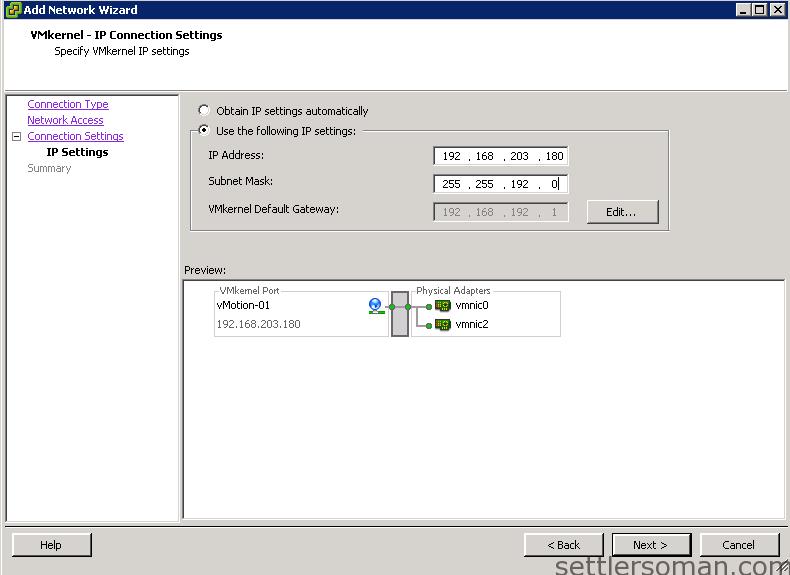
- Name the VMkernel portgroup (for example,
vMotion-01), and assign a VLAN ID as required. Click Use this port group for vMotion, then click Next.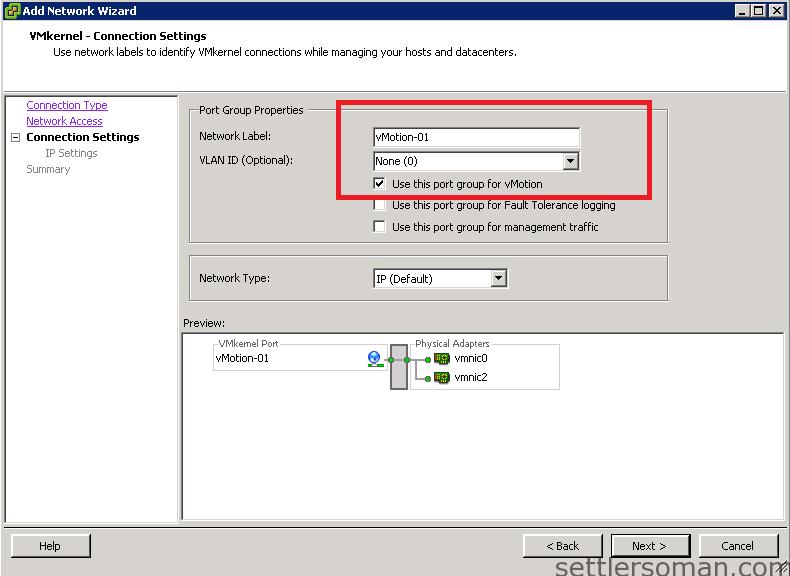
- Configure the IP address and subnet mask, then click Next.
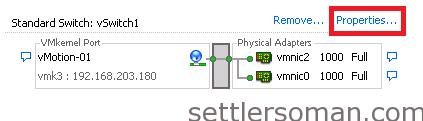
- Click the Properties tab of the vSwitch.
- Click Add to create a second VMkernel portgroup and follow steps 3-7 again.
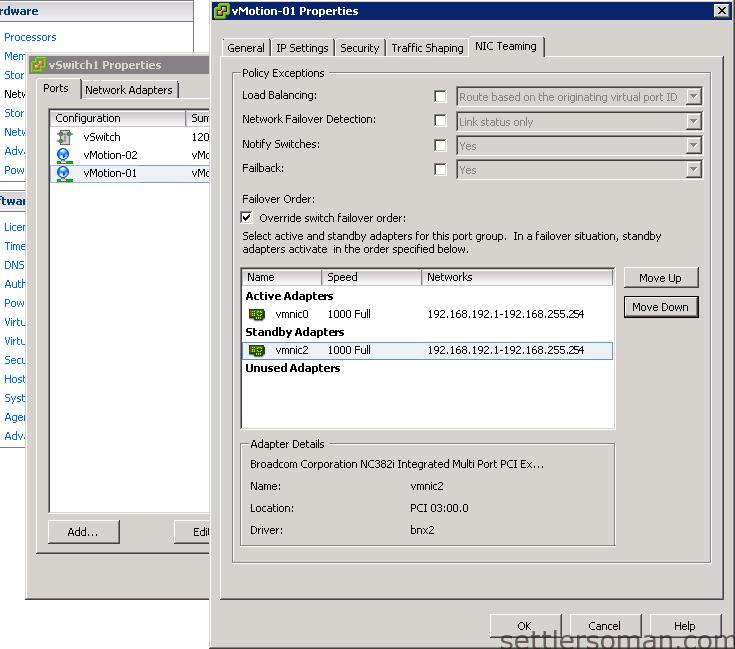
- Select the vMotion-01 portgroup, and click Edit.
- Click the NIC Teaming tab.
- Under Failover Order, select Override switch failover order.
- Configure the first adapter (for example, vmnic0 in my case) as active and move the first adapter (fin my case, vmnic2) to standby. Click OK.
- Select the vMotion-02 portgroup, and click Edit.
- Click the NIC Teaming tab.
- Under Failover Order, select Override switch failover order.
- Configure the first adapter (for example, vmnic2 in my case) as active and move the first adapter (fin my case, vmnic0) to standby. Click OK.
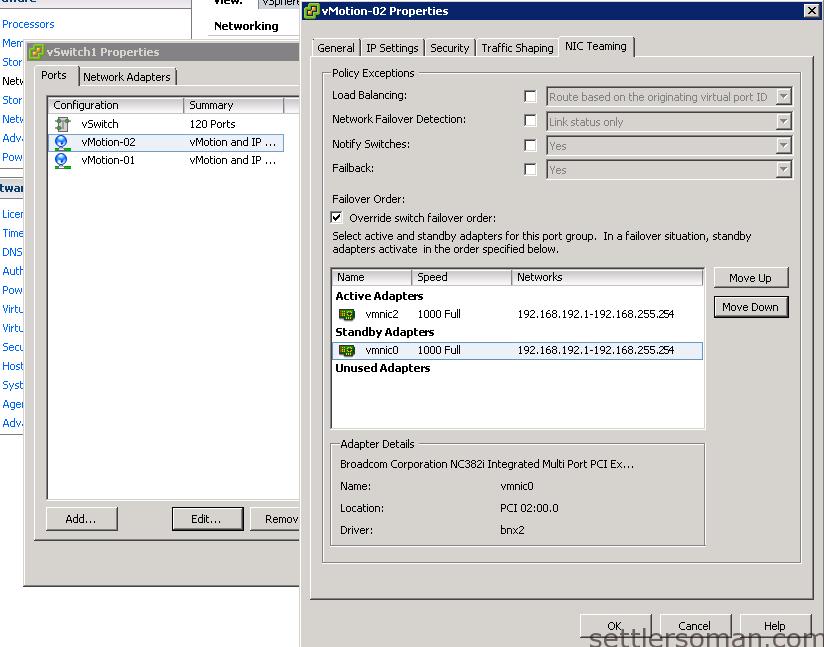
- The configuration should look similar as follow.
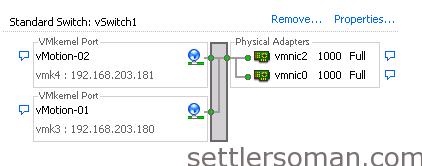
- If you have more NICs, please follow steps 3-13 for every VMkernel. Also on the Properties tab of the vSwitch, select each vMotion portgroup in turn and confirm that the active and standby adapters are the reverse of each other.
To configure Multi-NIC vMotion in vSphere 5.x on a Distributed vSwitch please follow steps:
- Log into the vSphere Client and click the Networking inventory.
- Right-click the Distributed vswitch, then click New Port Group.

- Name the dvPortgroup (for example,
vMotion-01). Click VLAN and assign a VLAN ID as required, then click Next and Finish.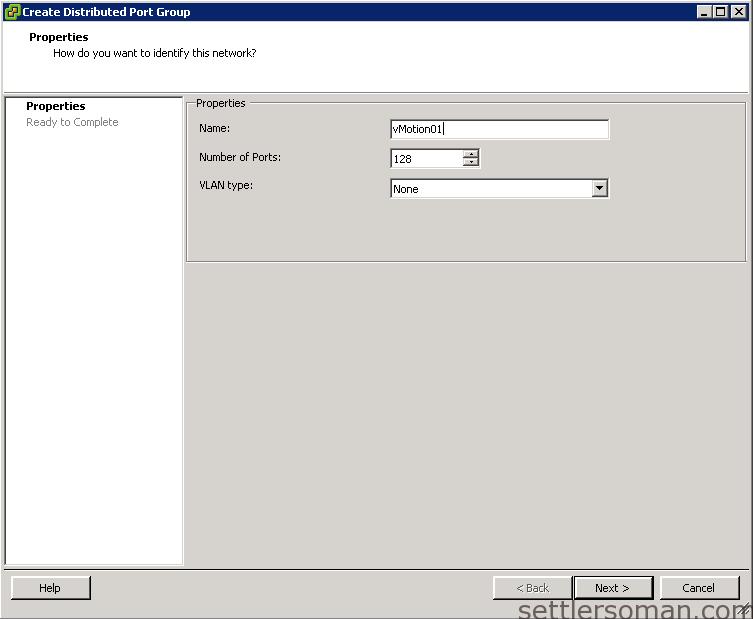
- Create the second portgroup following again steps 1-3.
- Select vMotion01 portgroup, click Edit Settings.

- Click the Teaming and Failover tab.
- Configure dvUplink1 as
Active Uplinkand move dvUplink2 toStandby Uplink. Click OK.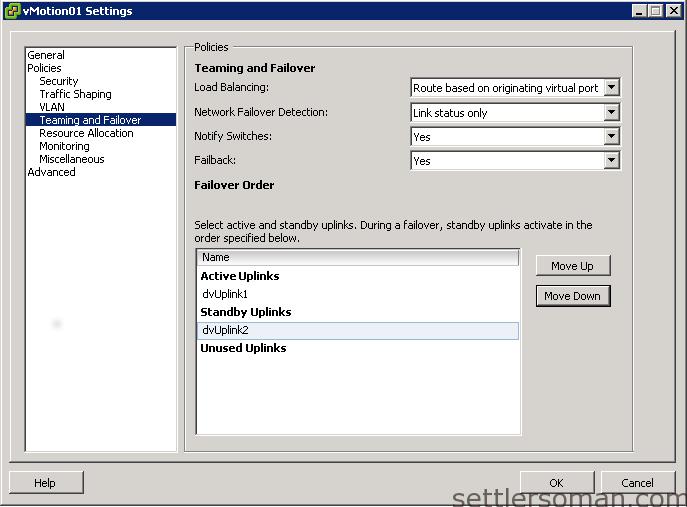
- Select vMotion02 portgroup, click Edit Settings. Click the Teaming and Failover tab.
- Configure dvUplink2 as
Active Uplinkand move dvUplink1 toStandby Uplink.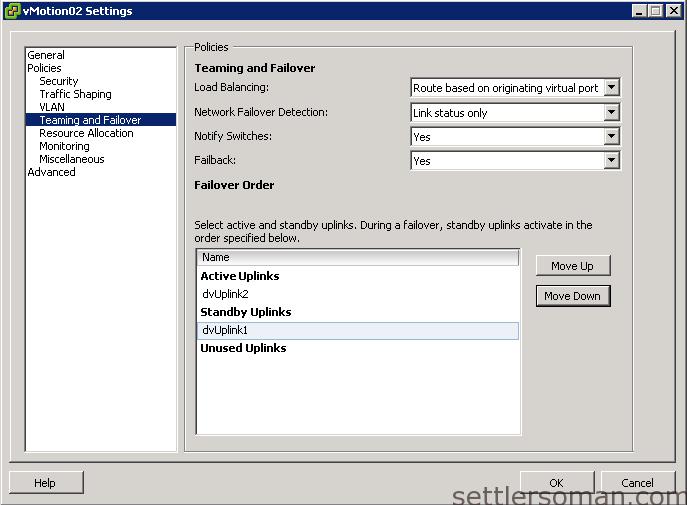
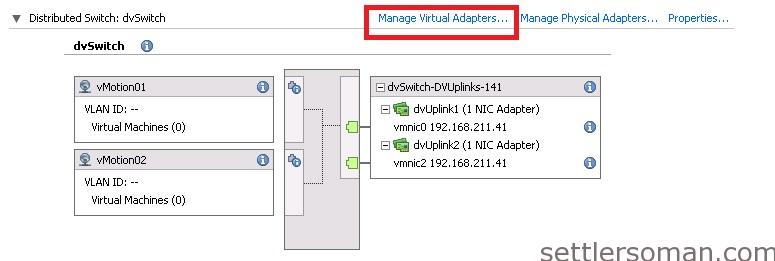
- Go the Hosts and Clusters Inventory tab, select a host's Networking, and click vSphere Distributed Switch.
- Click Manage Virtual Adapters and click Add to add new virtual adapter.
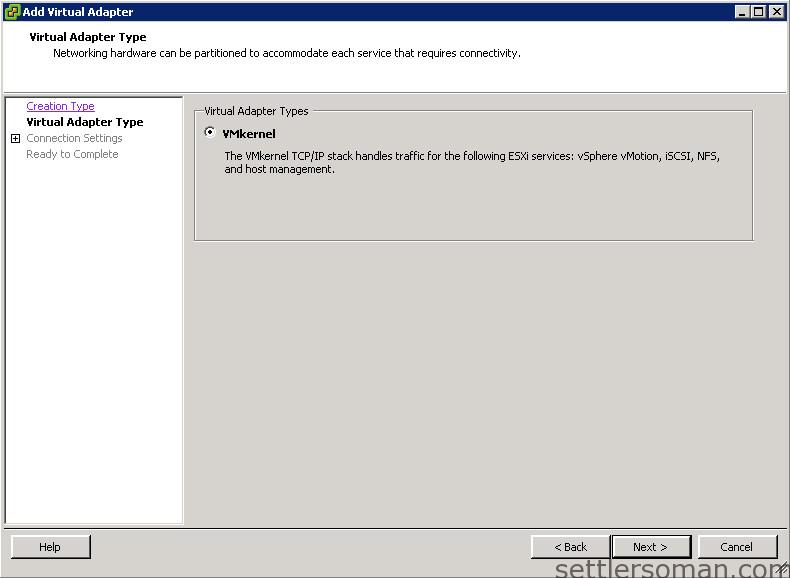
- Choose VMkernel as the Virtual Adapter Type.
- Select the
vMotion-01portgroup, click Use this port group for vMotion, then click Next.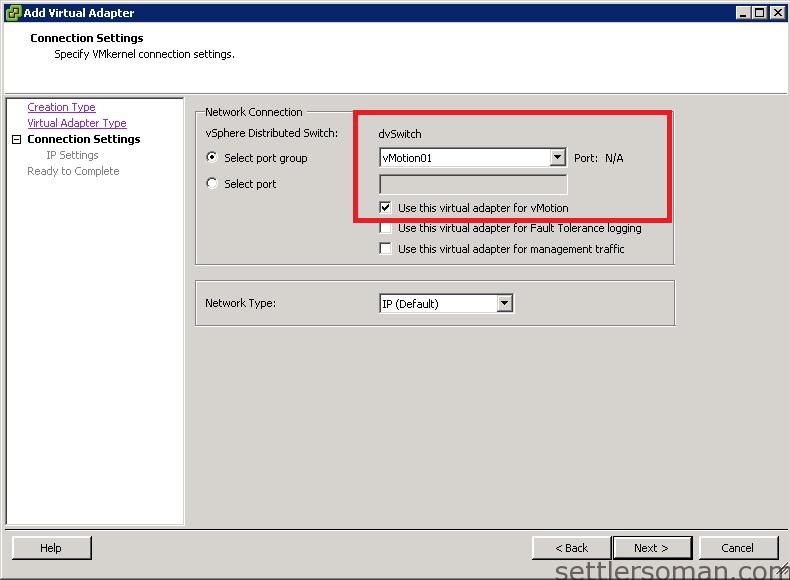
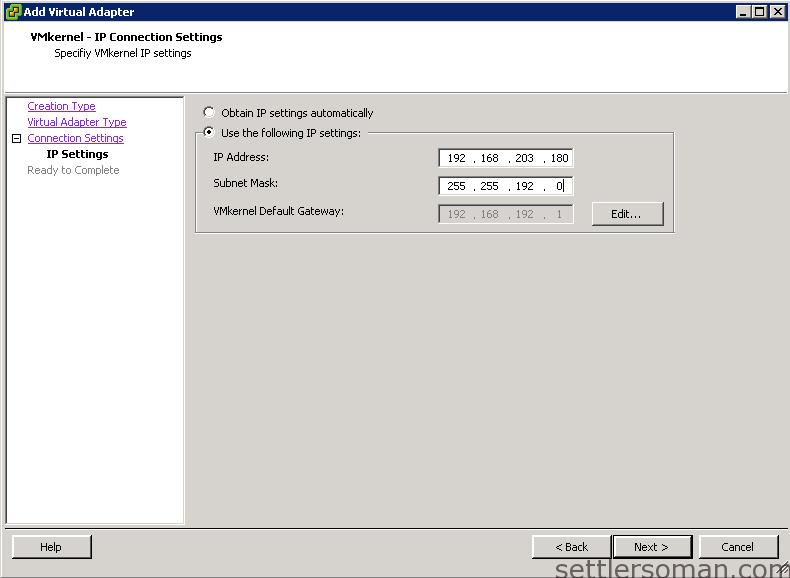
- Configure the IP address and subnet mask, then click Next and Finish.
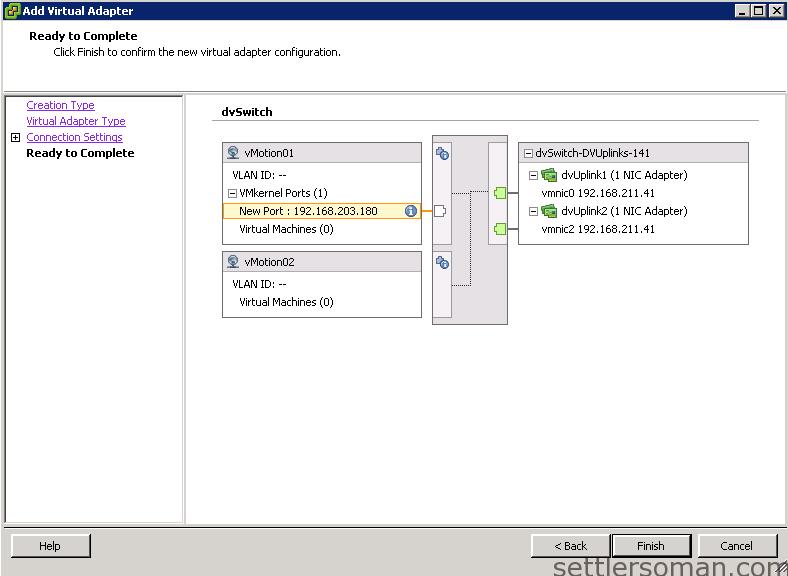
- Add another virtual adapter, then select the
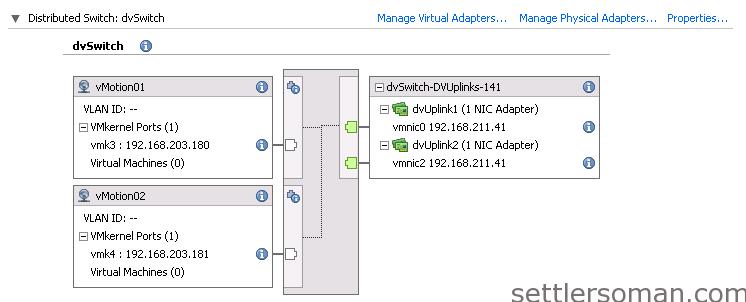
vMotion-02portgroup (follow again steps 12-14) - On the Distributed vSwitch, select each dvportgroup on VMKernel Port
vmk1andvmk2in turn, and confirm that the active and standby uplinks are the reverse of each other. - The configuration of Multi-NIC vMotion should like as follow: