
Last week I needed to prepare a small VMware test environment for my customer as I did a my customized VMware ICM training 🙂 I prepared nested ESXi VMs based on two main steps:
- Creating a VM with ESXi OS and adding two parameters into VM vmx file.
- Reconfiguring Virtual Switch/Port Group where ESXi VM will be connected.
However when we need to clone a nested ESXi VM (we don't want to install each VM manually, right? 🙂 we have to do some additional steps mentioned later in this post. I recommend to specify a small vmdk disk (max 5GB).
Creating a nested ESXi VM
As I already mentioned in post here, when we need to run a nested hypervisor (ESXi or Microsoft Hyper-V) we need to do some steps:
- Create a new VM on vSphere. In this case, we need to create a VM with ESXi.
- Power off the VM.
- If use Web Client please right click on VM and select Edit Settings. On Virtual Hardware tab, collapse CPU and change CPU/MMU Virtualization option to Hardware CPU and MMU. Then click OK.
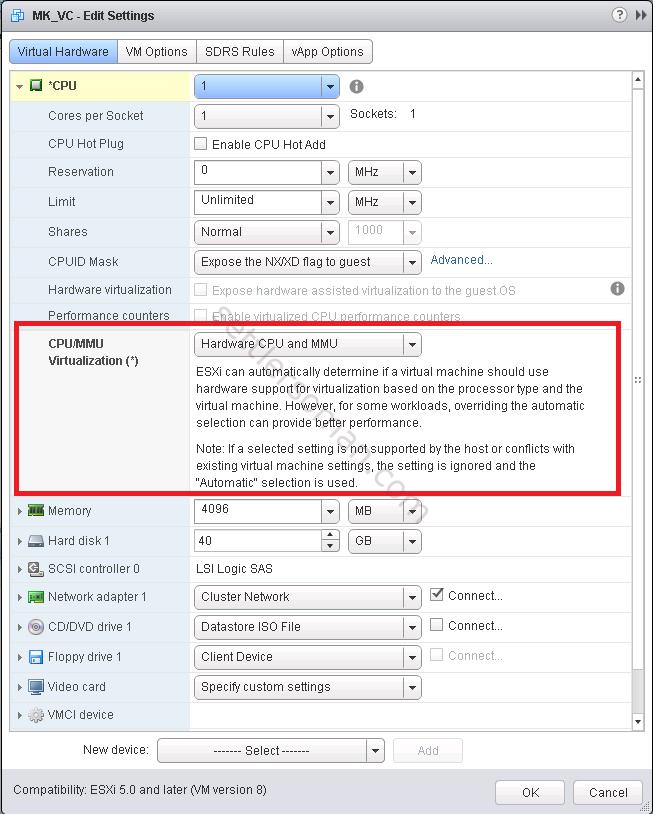
Change CPU virtualization option via Web Client
- Also we need to add two settings into vmx file by right clicking on VM and removing the VM from inventory.
- Locate the VM folder on datastore, download a VM .vmx file to your desktop.
-
Open the VM vmx file and add two below options at the end of file. Save the file.
hypervisor.cpuid.v0 = "FALSE"
vhv.enable= "TRUE" - Add to inventory/Register the VM again.
- Install ESXi OS following this guide.
Reconfiguring Virtual Switch/Port Group
We need to enable/accept Promiscuous Mode and Forged Transmits on Virtual Switch where ESXi VMs will be connected. Select ESXi host via vSphere client and go to the Configuration tab --> Networking --> click vSwitch properties --> Security tab.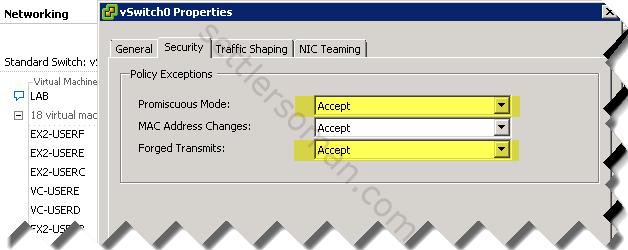
Preparing ESXi VM to cloning
Before cloning our ESXi VM, we need to do two steps:
-
Add an advanced settings to automatically update the VMkernel's MAC Address whenever the Virtual Machines's network adapted MAC Addresses changes (it happens during cloning a VM).
esxcli system settings advanced set -o /Net/FollowHardwareMac -i 1
-
Remove the current System UUID from /etc/vmware/esx.conf to be sure that a new UUID will automatically be generated when ESXi VM boots up after cloning.
vi /etc/vmware/esx.conf
Find a line with uuid by typing /uuid then clicking Enter:

Then type dd to remove the line and wq! to save and close the file. - Power off the ESXi VM.
Now you can clone ESXi VM properly..
Note: If you do not do above steps before cloning, ESXi VMs would not contact (e.g. no ping) each other in the same cluster or vCenter. In my case, I had problems with VMotion.
Update: If you clone ESXi VM with already formatted vmfs datastore, you need to run the following command after booting nested ESXi VMs (on each):
esxcli storage vmfs snapshot resignature -l volume