
Recently I have worked again and again on the following issue:
Cannot open the disk '/vmfs/volumes/4a496b4g-eceda1-19-542b-000cfc0097g5/virtualmachine/virtualmachine-000002.vmdk' or one of the snapshot disks it depends on.

Reason: The parent virtual disk has been modified since the child was created.
My customer was not able to power on a virtual machine. As mentioned in the following KB: http://kb.vmware.com/selfservice/microsites/search.do?language=en_US&cmd=displayKC&externalId=1007969 Content ID mismatch conditions are triggered by interruptions to major virtual machine migrations such as Storage vMotion or Migration, VMware software error, or user action.
The Content ID (CID) value of a virtual machine disk descriptor file aids in the goal of ensuring content in a parent virtual disk file, such as a flat or base disk, is retained in a consistent state. The child delta disks that derive from that base disk's snapshot contain all further writes and changes. These changes depend on the source disk to remain intact.
Depends on snapshot size, there are 2 ways to solve (power on VM) problem.
Solution nr 1 (recommended) by following steps:
- Please open the latest vmware.log and locate text sth like: "Attach: Content ID mismatch". You can find there an ID which you have to correct in the vmdk descriptor file.
Important: By default, ESXi/ESX hosts store vmware.log in the same directory as the virtual machine's configuration files.
- Log in to ESXi via SSH and change directory to the /vmfs/volumes/datastore_name/VM.
- Open vmdk file via vi editor. Please press "i" and move to the parentCID line.
- Correct the CID by changing the parentCID line value (after "=").
- Save changes and close the file via pressing "ESC" and ":wq!". Enter...
Important: If the VM consists of multiple virtual disks, probably you have to repeat the steps for the other .vmdk files. Please try power on VM. If still the problem exists, follow steps 1-5 again.
Solution nr 2 (snapshots with 0 bytes) is to modify VM hard disk to point a parent virtual disk file by doing the following steps:
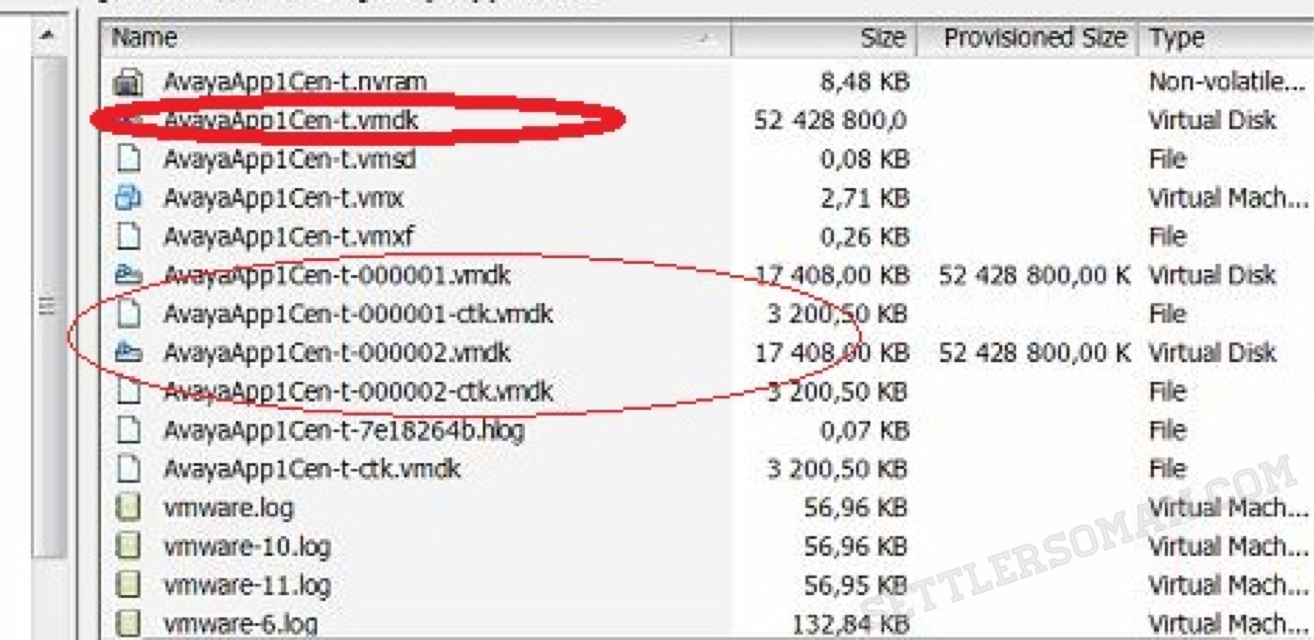
- Locate a parent virtual disk file (Browse datastore and VM folder):In my case the parent virtual disk file is AvayaApp1Cen-t.vmdk and snapshots: AvayaApp1Cen-t-000001.vmdk, AvayaApp1Cen-t-000002.vmdk.

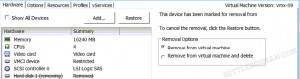
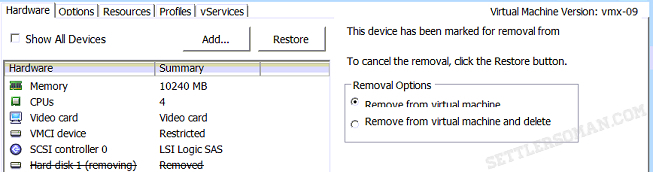
- Remove a Virtual Disk from a Virtual Machine. In my case I need to remove (without deleting from disk) AvayaApp1Cen-t-000002.vmdk.
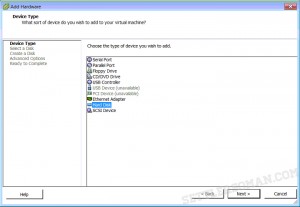
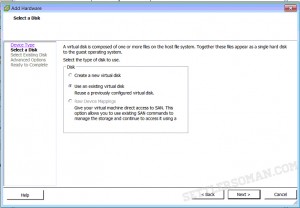
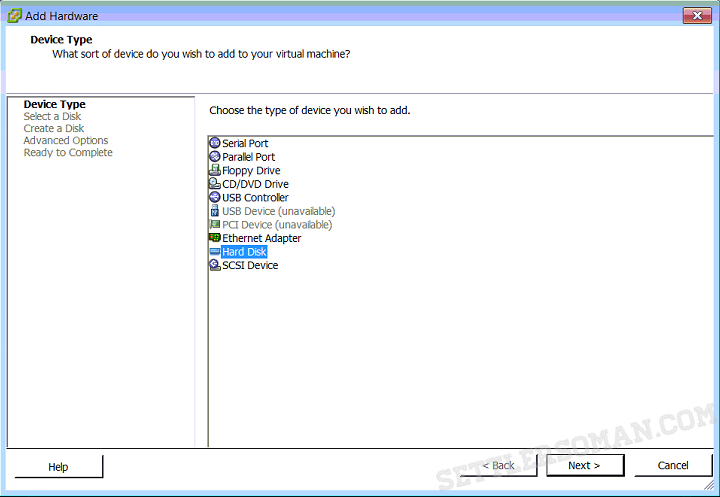
- Add an Existing Virtual Disk to a Virtual Machine. In my case AvayaApp1Cen-t.vmdk.
- After browsking and adding disk, click OK to save changes.
- If you receive the following warning you need to consolidate files (snapshots):
 To consolidate the files, right-click the virtual machine and select .
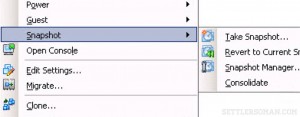
- Power on VM.


If Solution 1 or 2 does not help or VM behavior is not normal after power on, probably you will have to restore the VM from backup.
Snapshots are very useful but as mentioned in this article, snapshots can cause problems. Always you should try to adapt snapshots best practices and recommendations in your VMware infrastructure to avoid any problems with snapshots. Also you can monitor and use tools for deleting snapshots automatically.